
This chapter contains the following topics:
Customer Part Numbers and EDI Items
Use this selection for entering EDI Orders.
Select
EDI orders from the EDI interface menu.
Enter the fields.
Use this selection for entering EDI invoices.
Select
EDI invoices from the EDI interface menu.
Enter the fields.
Use this selection to pre-define your customer part numbers. This will ensure they are available during your order entry process. You may also use this selection to define EDI item master records.
Select
EDI items from the EDI interface menu.
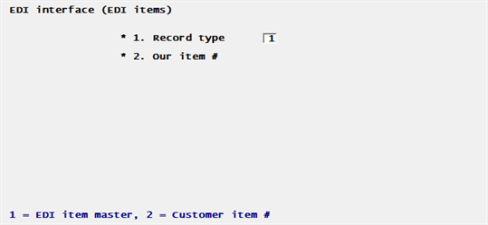
Enter the following fields:
Record type
Select either 1 for EDI item master or 2 for Customer item #.
| • | EDI item master – This is for the purpose of EDI Integration. After selecting EDI item master the only required field is the item number. You may prefer to enter a UPC code if you intend to implement EDI. |
| • | Customer item number - This is the more important record for the purposes of cross referencing your item to your customer’s item. You must have an EDI item master record entered before you can set up a Customer item number. |
Optionally, you may elect to enter the customer item number when entering a customer order line. See the Sales Orders section in the Sales Orders chapter.
Our item #
Description
This is a master item number. The description displays automatically after you enter the item number.
Customer Item Number
If the Type is Customer item number, continue with the Customer number field. If the Type is EDI item master, continue below with the 3. UPC code field.
Enter the customer number.
Enter the customer item number.
EDI Item Master
Enter these fields for an EDI item master record type:
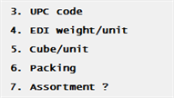
Enter the UPC Code.
4. EDI weight/unit
Enter the EDI weight/unit.
5. Cube/unit
Enter the Cube/unit.
6. Packing
7. Assortment
Comments may be entered for both a customer item and EDI item.
Select the <F6> key to access Comments entry and display. A window like this displays:
Start entering comments. When finished select OK to save the comments or Cancel to exit the screen without saving any comments.
For an existing entry you may position the cursor on any line and select <F1> to erase the remaining lines.
This will allow you to have a unique customer part number for each and every customer and item you have in your database should you choose to.
Once created, you can now take advantage of the customer item number feature while entering a new sales order line. In the screen shot below, notice the Customer item # field in the Customer orders line entry:
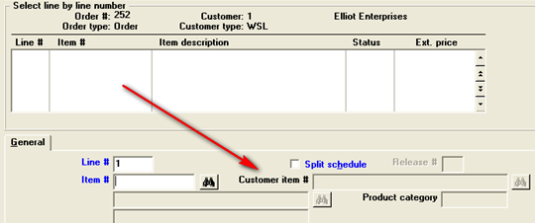
This field includes a look-up which will allow you to either enter the customer’s part number or to do a search for part numbers tied to this customer. If you enter a customer part number, it will be validated against EDI Items.
When a valid customer item number is either selected or entered, the item number and description will be completed automatically. Consequently, if a valid item number is entered and a customer item number exists, the customer item displays as well. This data is not stored in Sales Order Items. Instead, it is a link made to your cross reference number as assigned in EDI Items.
Use this selection to print EDI items.
Select
EDI Orders from the EDI interface menu.
The following screen displays:
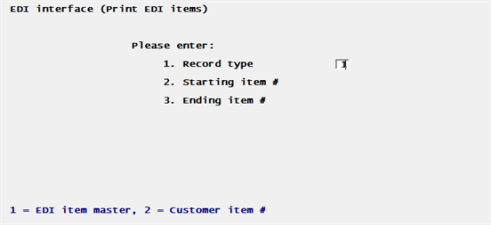
Enter the following fields:
1. Record type
Select 1 for EDI item master or 2 for Customer item #.
1. EDI Item Master – This is required as the original design of this program was for the purpose of EDI Integration. The only fields required are the record type 1, and your item number. You may refer to enter a UPC code here if you intend to implement EDI as well.
2. Customer Item # - This is the more important record for the purposes of cross referencing your item to your customer’s. You must have the record type 1 entered before you can set up record type 2. When you select Customer item # the Customer # and Include item comments ? fields display.
2. Starting item #
3. Ending item #
4. Customer #
This field can only be entered if you selected a record type of Customer item #.
5. Include item comments ?
This field can only be entered if you selected a record type of Customer item #.
Use this selection to enter trading partners.
Select
Trading partners from the EDI interface menu.
Enter the fields.
Use this selection to enter standard carrier codes.
Select
Standard carrier codes from the EDI interface menu.
Enter the fields.